Showing posts with label crafts. Show all posts

Wednesday, April 9, 2014

Learning new things

Yep I'm learning new things.  I changed the oil in our gas generator yesterday.  What a pain!  Why they put it behind a bar almost on the underside of the generator I don't know but it makes it difficult to change the oil.  I had to tip it one way to get the oil out and then tip it the other way to put new oil in. And that thing is heavy.  I did spill oil...oh well it's done anyway.

I wanted to show you the owls I made my mom.  I got the kit from Mary Maxim.


Sorry that some of them are a little blurry.  I took the pics with my phone.  Something else I learned.  Aren't they cute though?  I sent them as a surprise before Thanksgiving.  They are made out of felt with little touches of embroidery.  I even got myself a kit to make them too  :)  Mary Maxim even has Halloween owls and Christmas owls too. I just loved the mummy one.  Think I'll have to get the kits for those too and some for my mom as well.  She loved them.  Cost me to ship them to her but they didn't weigh anything it was the size of the box I had to put them in so they didn't get crushed.  I never worked with felt before so this is also something I learned.  I'll try to get some more pics on here.  I know everyone loves pics.
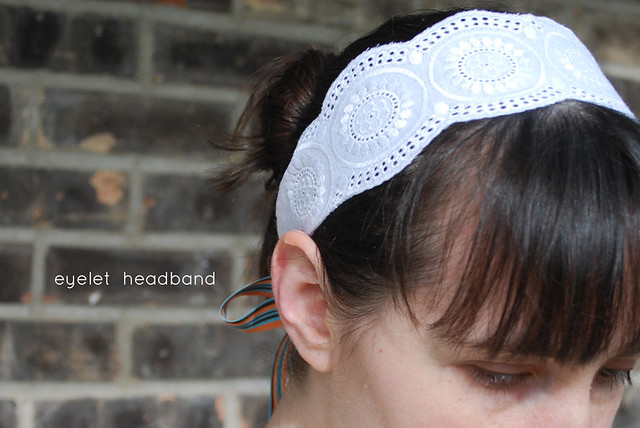
Next, learning how to service the riding lawnmower which I haven't done before and then cutting the grass (which I have done before when DH would let me - it's his toy not mine LOL) 

Hope everyone enjoys the spring weather - summer's just around the corner!

Saturday, August 11, 2012

Craftsy is having a sale!

If you want to learn a new craft or brush up on one you already do check out Craftsy's site.  They have classes you can take when you have time and the classes never have to be renewed.  Once you buy a class it's yours forever.  I've taken several and they are great!

http://www.craftsy.com/clp/summersale-2012-1499

PS - I am not being paid to tell you this.  Just thought you might want to get in on some great classes.  They even have free ones!


Tuesday, April 10, 2012

Been away from the blog for a while...

To update everyone on how much I've been doing...and how exciting my life is...

The chickens are laying again...a lot.  I have several dozen eggs in the fridge.  We eat eggs almost every day for breakfast and I even made some egg salad the other day for lunch.  I really don't want to eat them for supper too, really I don't.

We planted cabbages, peas, lettuce, basil, potatoes in the garden.  I guess too early cause guess what, we're getting a freeze tonight and tomorrow night...hmmm hope we don't lose the blueberries and grapes.  I wanted to cover them tonight but hubby said they should be OK since it's a light freeze so he can't blame me if they freeze and all the berries drop off.

Dad and mom called yesterday to let me know that they had to rush to the hospital cause mom was having chest pains at 1 a.m.  Turns out she has a hiatal hernia and not having a heart attack.

We close on some new property we are buying tomorrow.  5 acres of land in Tennessee!  No house on it but we are planning on building one or getting a trailer (I don't like trailers, been there, done that and don't want to do it again :)  Hubby was thinking we might just build a pole building and then do the inside like we want but he wants to have a garage door...what?  Anyway he says then it will be easier to move in the furniture and appliances.  Guess  you can't argue with that logic huh?

My brother is moving to New York.  Dad and mom finally got him on the phone, hadn't heard from him for over two weeks.  I had left a message a couple of days after he had called me drunk.  He's an alcoholic and fell off the wagon again.  Glad he's OK.  Wish he would get his act together.

Our geriatric cat is on his last legs I'm afraid.  He's dragging his back leg and peed on our bed the other day.      I couldn't yell at him or anything, he's so old.  If he gets any worse, we'll probably have to take him to be put to sleep.  As long as he's eating and drinking, we'll keep him and love on him as long as possible.  Had to give him a bath tonight though he stunk so bad (all the peeing I think).  He's good about going to the litter box usually though.  I have shut him out of the bedroom.  I had the devil of a time getting the top pillow top clean (we have an air bed) and the top zips off.  It is so bulky and barely fits in the washer.  I put it outside to dry.

Hubby has been sick  but won't go to the doctor until after we sign the papers for the land.  I'm calling the doc to make an appointment when he's outside tomorrow...sneaky huh?

I got one cross stitched picture done.  I need to take some pics of it.  It's a fruit label and I'm making quite a few others to go with it.  I think I will make a quilted hanging out of them.  I'm still working on several sweaters and a pair of socks as well.  I get bored with one project and go to another one.

Well that's all I can think of for now.  Hope you had a very nice Easter!

Denise

Thursday, August 18, 2011

T-shirt rug

http://www.youtube.com/watch?v=NtKihiq013w&feature=player_embedded

Another way to make a rug using old T-shirts!

How to make a rag rug tutorial

Gather some cloth.  I used up some fat quarters and yards of fabric I wasnt too crazy about and used them for this rug.  Cut (or rip) 2 1/2 inch strips.  I tried to use the length of the fabric for my strips.  When I used the width of the fabric (from selvedge to selvedge) I left the selvedge on as you can see in the following pics.  It's a rag rug after all so no need to be too picky.  If you wanted to you could iron your strips and even hide the raggedy edges depending on the look you are going for.


Take your the first strip and cut about a one inch slit about 1/2 to 1 inch in from the end.  If you goof and cut too near to the end, just lop off that section and start again.

With the right side of the first strip facing you, pull your second strip through that slit with the wrong side facing you (of the second strip).  Cut a slit in the second strip the same way you did the first strip.

Now you are going to take the second strip's other end (without a slit) and pull it through the slit you just made in the second strip.  It's like a slip knot sorta.

Pull on that second strip until a knot forms but not so much that you hear cloth tearing (not so good to hear that :))  Continue adding strips this way until you get a length that you are comfortable with to start the rug.  I made my rug rectangular.  I used a big crochet hook (I think it was a L size) and started the rug with a chain of about 12-15 stitches (of course I did this tutorial after I crocheted the rug and didnt write anything down before).  You will crochet around that chain on both sides using a single crochet and making 3 single crochets in each end of the piece.  I did not join on any round, just kept going around in circles, kind of like my life LOL. 

Here is a pic of me doing the single crochet.  I just did each stitch in the back of the loops to form a ridge on the top of the rug.  There are tutorials on the internet for doing single crochet.  I'm afraid I'm not very good explaining it on here but just google it and you'll find a tutorial on it.  It is an easy stitch to do.  One tip, when you pull your loop through the two loops on your needle pull it a little bit looser than you would normally.  This will help keep the rug flatter I found. 


  When you get to the 3 stitches you made in the ends make 3 stitches in the first stitch and 3 stitches in the third stitch.  This will make your corners for the rectangle.  Every round make three stitches in the middle stitch of those three stitches.  Hope that is clear as mud ;)

Here is my completed rug.  It isnt too big just big enough for the bathroom.  You will have a lot of threads come off or at least I did and I just cut those off when they got in my way.  If you are going to use this with children or older people, you might want to use one of those rug backers on the back as it can be slippery underfoot.  I found that this is a cat magnet!  Yes my cats were sleeping on it every chance they got as I was making it cause I would put it down on the floor when I stopped working on it for a while.  It is a great use for all those odds and ends and you could even use some old tablecloths or sheets as if they are stained you wont notice that once it is crocheted up.  The 2 1/2 inch strips make for a very cushy rug but you could also do thinner strips too.  I didnt work nonstop on this because I found that my hands hurt from crocheting and tugging the loops through especially when I came to a knot but then I do have carpal tunnel so you may have no problems at all.

Oh I almost forgot - to end the rug just pull the end of the last strip through and pull tight.  I wove the end into the back side of the rug under some of the previous stitches.  Cut the remainder and you are ready to use your rug!
If you have any questions or problems with this tutorial, just let me know and I'll address them in an another blog entry.

Talk to ya later!

Denise

I have linked this (I think) to:
and
http://sewmanyways.blogspot.com/search/label/sew%20darn%20crafty" target="_blank">sew many wayshttp://i1187.photobucket.com/albums/z381/sewmanyways/polkadotsewdarncrafty.jpg"/>>

Monday, March 28, 2011

Eggs, Chickens, Gardening and Crafting....

Here are two eggs that our chicks laid.  The one on the right is large...

Here are the same two eggs showing how large they actually are against a dollar.

And here it is in the frying pan.  The larger ones seem to be more watery and not double yolkers.  We havent had any double yolkers in a while.

More egg pics. 

And here is the biggest one we have had yet.  Ouch that must have hurt coming out!

Here are our tomatoes and peppers under the grow light.  You're not supposed to look at the light and of course I kept looking at it so covered it with a couple of napkins.  Makes the dining room look kinda psychodelic....

This is Lettie!

This is DH with Lucy.  She likes to poke him in the bum and fly up on his shoulder.

This is a close up of Lucy.

This is the clothes basket I made from clothesline and 1" strips of cloth.  Didnt think I would ever get it done.  I used a little over 100 feet of clothesline and at least 6-7 yards of cloth.  It works really well.  It is much easier to carry out the back door since it is so flexible and you can actually reach the doorknob which was kind of hard before to do.

Here is another pic.  I used a lot of different colors.

Here is the bottom.  Not too pleased with it but it held quite a bit of wet laundry so it turned out OK.  Starting the basket was the hardest part and I just continued to weave it when I watched TV at night for a few hours.  All in all it was a good project and easy to do.  I had some left over clothesline and started another basket (really small one).  If I do another clothes basket I think I will use thicker cord because this was on the thin side and if it is thicker you wouldnt have to do so many rounds.  Thicker cording means thicker fabric strips as well.

Here is DH with the new and improved Chicken run and if you look real close you can see Lucy is on his back/shoulder.  We planted some of our garden.  You can see DH's experimental plots behind him.  He planted oats, alfalfa and clover for the chicks to graze on this summer.  Our garden (not for chickens) has potatoes, walking onions, garlic, beets, peas, cabbage, swiss chard, and collard greens.  Now we are wondering if we should have waited cause we have been having major rainstorms here.  Hoping the seed doesnt rot in the ground.  We had a bit of a heat wave a couple of weeks ago but since then it's been colder.  Even had to cover our blueberries, raspberries and grapes because we got a hard frost.  Luckily I have plenty of pieces of fabric for the job.  Told hubby he didnt know how lucky he was to have a wife with so much fabric LOL. 

Talk to ya later!

Denise

Tuesday, March 22, 2011

DIY Dish

If you havent checked out the DIY Dish site, you really should.  They have great ideas and give you patterns to make the things that they have on their site on video.  This is the newest one - making a bird pin cushion.  They also have giveaways.  Enjoy!

http://www.thediydish.com/2011/03/joel-dewberry-joins-the-diy-dish-twins-make-a-bird-pin-cushion/

Sunday, June 13, 2010

Darnit/dammit doll swap on MaryJane's Farm

http://theswappingcrafter.blogspot.com/2010/06/lifes-not-perfect-nor-am-i.html  Here is a link to the farmgirl I swapped a darnit/dammit doll with.  I posted pics below.  Enjoy.


I used a paisley fabric for her body and then just started adding hair, button eyes, embroidered mouth and a little apron.  We had to make up our own pattern as well.  She also has a poem that I stuck into her apron and in her other hand she is holding some silvery beads. Since she is supposed to be a gardening darnit/dammit doll and the beads are supposed to be frost...Went a little wild on the hair but Robin said that she liked it and that's all that matters.This is the darnit doll Robin sent to me.  She did a lot more embroidery than I did and the beaded hair is so cute and on the his back he has a sign that says kick me!  Too cute.

Talk to ya later!

Denise

Tuesday, April 13, 2010

Quilting

For those of you who want to learn how to quilt check out obsessivelystitching.blogspot.com.  Care is going to learn us how...  so grab your supplies and mosey over to the crafting table for some instruction...;)

I have started a quilt but not finished one yet so am hoping to pick up some pointers on finishing one. 

Talk to ya later!

Denise